 Skip to content
Canva is a free and beginner-friendly graphic design tool that makes creating graphics fast and simple. It has millions of users around the world who love its ease of use and wide variety of templates and tools.
Whether you’re just starting or exploring new ways to create visual content, this Canva guide for beginners walks you through everything, from templates to finished designs. You’ll see why it’s one of the best platforms for graphic design with Canva, even if it’s your very first time using a design tool.
Just a heads up! We’ll be using Canva Free for this beginner-friendly walkthrough.
How to Use Canva: The Design Process for Visual Content
To get a better grasp of how to use Canva, let’s break down the design process step by step. Canva’s array of beginner-friendly tools can be exciting but also overwhelming, especially if it’s your first time using the platform.
But wait! Aren’t we forgetting something?
Now I know what it is…
Can you guess?
We were so excited talking about Canva that we forgot one key step: logging in! How can we start creating if we haven’t even logged in yet?
What are you waiting for? Let’s do this!
Open a new web browser and go to https://www.canva.com. This is where your Canva journey begins. Just click the Login button to get started.
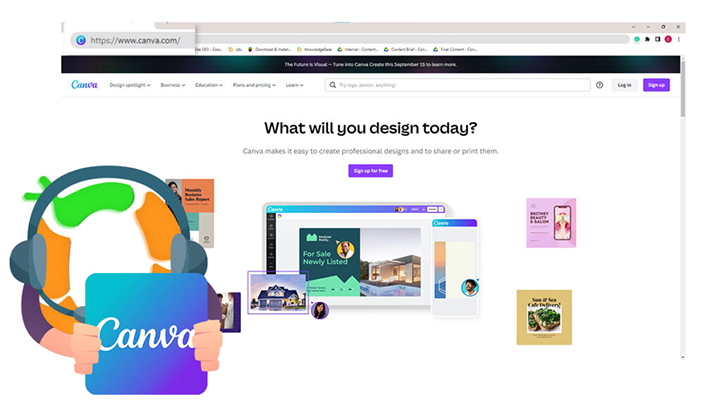
Don’t have an account yet? No problem. Just click Sign Up. No matter which option you choose, a simple pop-up window will guide you through the process. Easy peasy!

Choose what details you want to use to log inside Canva. Well for me, since I already have an account. I will go with “Continue with Google“. Another pop-up will show and I will click on my Email. And voila! We are now in Canva.

Before we start, you may want to prepare something to munch on and a beverage. Because there will be no stopping once we start, and no bathroom breaks. I’ll give you a minute to prepare
Alright, time’s up! Please step into the Canva Zone.
Let’s start off by identifying the different areas of Canva’s home page, which are the “Top Bar,” “Side Navigation Bar,” and “Main Screen“.
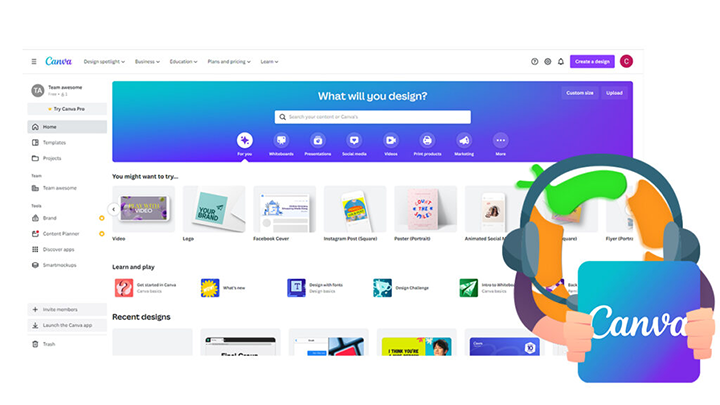
First is the “Top Bar”. In this bar, you will see 5 drop-down options. You will need to hover your cursor over those drop-downs in order for to see the options.
Next up is the Side Navigation bar located in the leftmost part of the screen, which can be hidden and unhidden if you click the Hamburger icon on the top left corner. Here you will see Projects, Your Teams, Tools, Invite Members, Launch Canva App, and Trash.
Then we have the Main Screen, which contains the Search Bar, Learn and play, Your recent designs, Canva updates, Suggestions from Canva, and shortcut icons for effortless navigation.
Now that we are done with the introductions on its home page. Let us move on to the part where we use our Frontal cortex— the hub of creativity.
Brainstorm Design Ideas in Canva to Spark Inspiration
If you’re looking for ways to make your business idea successful, you’ll need lots of different skills. Thankfully, you don’t need to be adept in every field! You just need to learn how to brainstorm effectively.
When it comes to creating a new design, you might want to start by thinking about the type of designs that you already like. This is because you can get inspired by other similar designs.
You should also try to keep yourself focused on one topic at a time. If you can do this, then you can avoid getting distracted from your main goal.
Finally, you should always remember to write down all of the things that you come up with. When you do, you’ll be able to organize them in a way that makes sense.
Your brain needs to work hard when you are trying to come up with good ideas. So, you may not be able to generate many great thoughts on your first attempt. But if you stick with it and practice, you will eventually become better at generating creative ideas.
Sounds easy, right? Well, easier said than done. But don’t be too hard on yourself, this is exactly why Canva was created. With its beginner-friendly interface, ready-made templates, and smart design tools, you won’t have a hard time brainstorming ideas that catch attention.
With all that said. Let’s choose a theme. For now, I choose cakes because, at the moment, I’m craving cakes. Since cake is life!
Identify and Use Canva Templates to Create the Right Graphic Material
Alright! Our theme is cakes! Wait! What are we gonna do with cakes?
Hmmm… I know, let us go inside Canva to identify and create the appropriate material.
As you’ve seen on the Canva homepage, there are plenty of shortcuts you can use to start creating a design right away. But for beginners, we’ll skip the “Create a design” button for now. That option is usually best for professional designers who prefer building from scratch. It generates a blank canvas, which can feel a bit overwhelming if you’re just starting out.
Instead, we’ll use Canva templates, pre-made layouts that make graphic design with Canva much more approachable and efficient for beginners.
So, to begin, let’s go to the navigation bar and click on the “Templates” tab. This will route us to a new page where you’ll see different categories, such as: Business, Social Media, Video, Marketing, Custom Prints, Cards & Invitations, and Education.

For this demo, I’ll go with Marketing, as it’s a widely used and straightforward option. Click on Marketing, then Posters, and at the top of the page, you’ll see all the subcategories nicely arranged. From there, select Advertising.

A variety of Canva templates will now display. If you’re feeling overwhelmed by all the options, you can filter them by Style, Theme, Color, or Price.
Since we’ve chosen cakes as our theme to advertise, we’ll tick “CAKE” under the Themes filter. Now, the results are narrowed down. Pick the perfect template that matches your needs. Once selected, a pop-up will appear, click “Customize this template.” A new tab will open up, and that’s where the fun begins: editing!

Use Canva’s Built-in Picture Library to Choose the Best Images for Your Design
Take advantage of Canva’s built-in picture library, a helpful feature for beginners in graphic design. It includes a wide range of stock photos, perfect for finding the ideal image to support your message or theme. On the side panel, you’ll find design tools like “More,” which opens a sidebar with more options.
Wondering what those crown symbols mean? They mark premium images available to Canva Pro users, something we’ll explore later in this Canva guide.

You’ll see “Photos” in the side panel. Once clicked, it will be added to your tools. Let’s search “cake” in the search box. You’ll instantly get a barrage of cake images, perfect examples of how graphic design with Canva is both simple and versatile. Click one, and it’ll auto-populate your canvas. Then, drag and drop the image you want to replace.
Want to use your own cake image? Great! This is where Canva’s drag-and-drop design tool shines. We’ll click “Uploads,” open the folder, and simply drag the file into Canva. Magic happens, your image is now part of the design.
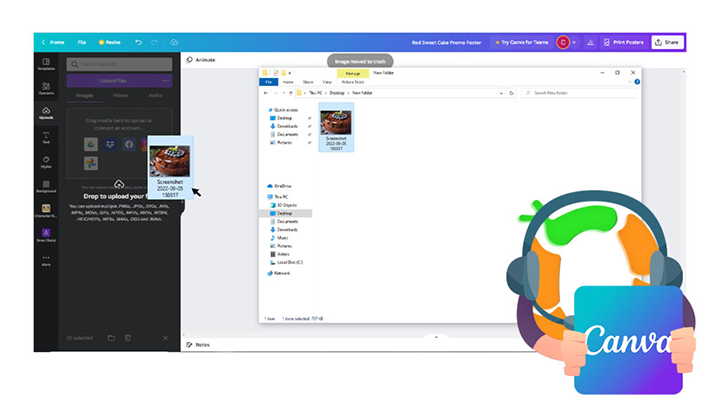
And presto! It automatically uploaded the image. Wasn’t that just spectacular?! Then drag and drop the image over the photo you want to replace, and that’s it.
Mix Text and Images Using Canva’s Typography Tools
Typography in Canva lets you mix text and images creatively. Use Canva’s built-in fonts and text tools to enhance your design, align with your theme, and boost visual appeal.
We will click the text to replace the information or delete it. Then go to the side panel and click on the text to choose what typography will suit our cake poster. I have an idea! Let’s use what I said earlier as a hashtag. Let’s type in “#cakeislife” and we will choose “Quicksand”.

Click on the A icon on the editing pane. It is on the middle top to change the text color. And look! Isn’t it stupefying how Canva detects the color scheme on the poster you used and the uploaded photo? This makes brand consistency easier.
Enhance Your Canva Designs with Filters, Effects, and Shapes
Improve the look of your designs using Canva’s filters, effects, and shape tools. Whether you’re changing colors, adding borders, or cropping images, Canva makes it simple to enhance your visuals with just a few clicks.
When you upload an image to Canva, you have the option to apply different effects to it. For example, you can change the color, add a border, and even crop the picture. There are many other options as well.
For now, let’s try the Filter tool on our cake photo. To do this, we click on the image and an Editing Pane will show on the top part of your page. Then click on “Edit Image” and click on the Filter button in the top left corner of your screen. Scroll down to browse the filter that you want. In this case, I will choose “Afterglow” because it makes our cake image look scrumptious.

But I feel like there is something missing. How about we add some shapes? We will click “Elements” on the left side panel for graphic elements. Then click “Line and Shapes”. I will pick arrows to point toward order now to prompt our viewers to buy cakes from us and it feels complete.
Share Your Canva Designs on Social Media Platforms
Hey ho! It’s time to advertise our work! I mean… Our cake!
Canva makes it easy to share your finished designs on popular social media platforms like Facebook, Instagram, Pinterest, and more. Use the built-in sharing tools to publish your work directly and boost your online presence.
For our poster, we will share it on Facebook! So we click “Share” on the top right corner and then go to “share on social”. Pick “Facebook Page” then just write a short message.
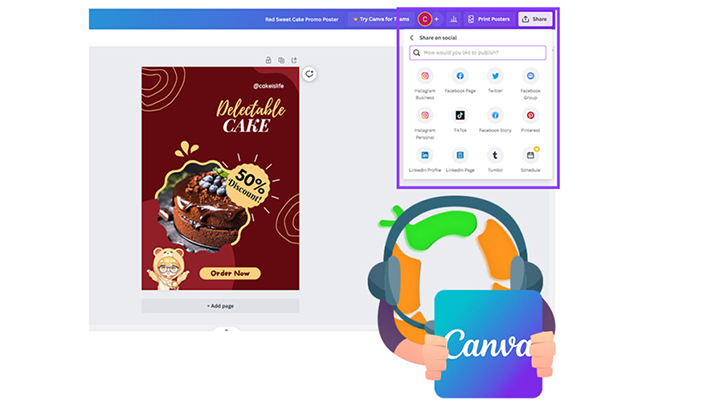
And with that, we are done! Good thing I told you to prepare some snacks and a beverage. Cuz boy! That cake poster we designed made me hungry! It just goes to show how effective Canva is. Imagine if you have access to Canva Pro.
Upgrade Your Canva Designs with Pro Features and Expert Help
If you want to create more mind-blowing graphics. Subscribe to Canva Pro!It has access to premium content, features, fonts, and stock images. This means that you can have access to all the tools that you need to make high-quality graphics. It certainly will level up our cake poster!
Still feel that you don’t have enough design experience with Canva Pro. Then you are in luck! OBI Services can help you. With our graphic designers. We can create business cards, blog posts, social media content, and marketing materials.
Quick Summary: Key Canva Features for Beginners
Once you get the hang of things, you will be able to:
- Create stunning designs quickly with Canva’s drag-and-drop graphic editor
- Add text, shapes, icons, and images to your projects
- Use Canva’s editing tools and visual effects to refine your work
- Export your designs in popular formats like JPG, PNG, SVG, and PDF
- Share visuals easily via email, social media, or web publishing
Final Thoughts: Why Canva is the Best Graphic Design Tool for Beginners
Canva is an all-in-one design solution for both the artistically inclined and design beginners. It helps create stunning visuals with its easy-to-use drag-and-drop graphic editor. From marketing materials to social media content, Canva makes everything smooth and accessible, even if you’re just starting.
With its wide range of templates, collaborative features, and user-friendly tools, Canva empowers anyone to turn creative ideas into professional-quality designs without needing advanced design experience. It’s a platform that continues to bridge the gap between creativity and accessibility, making graphic design easier for everyone.
👉 Read more: Blogs/Knowledge Base


